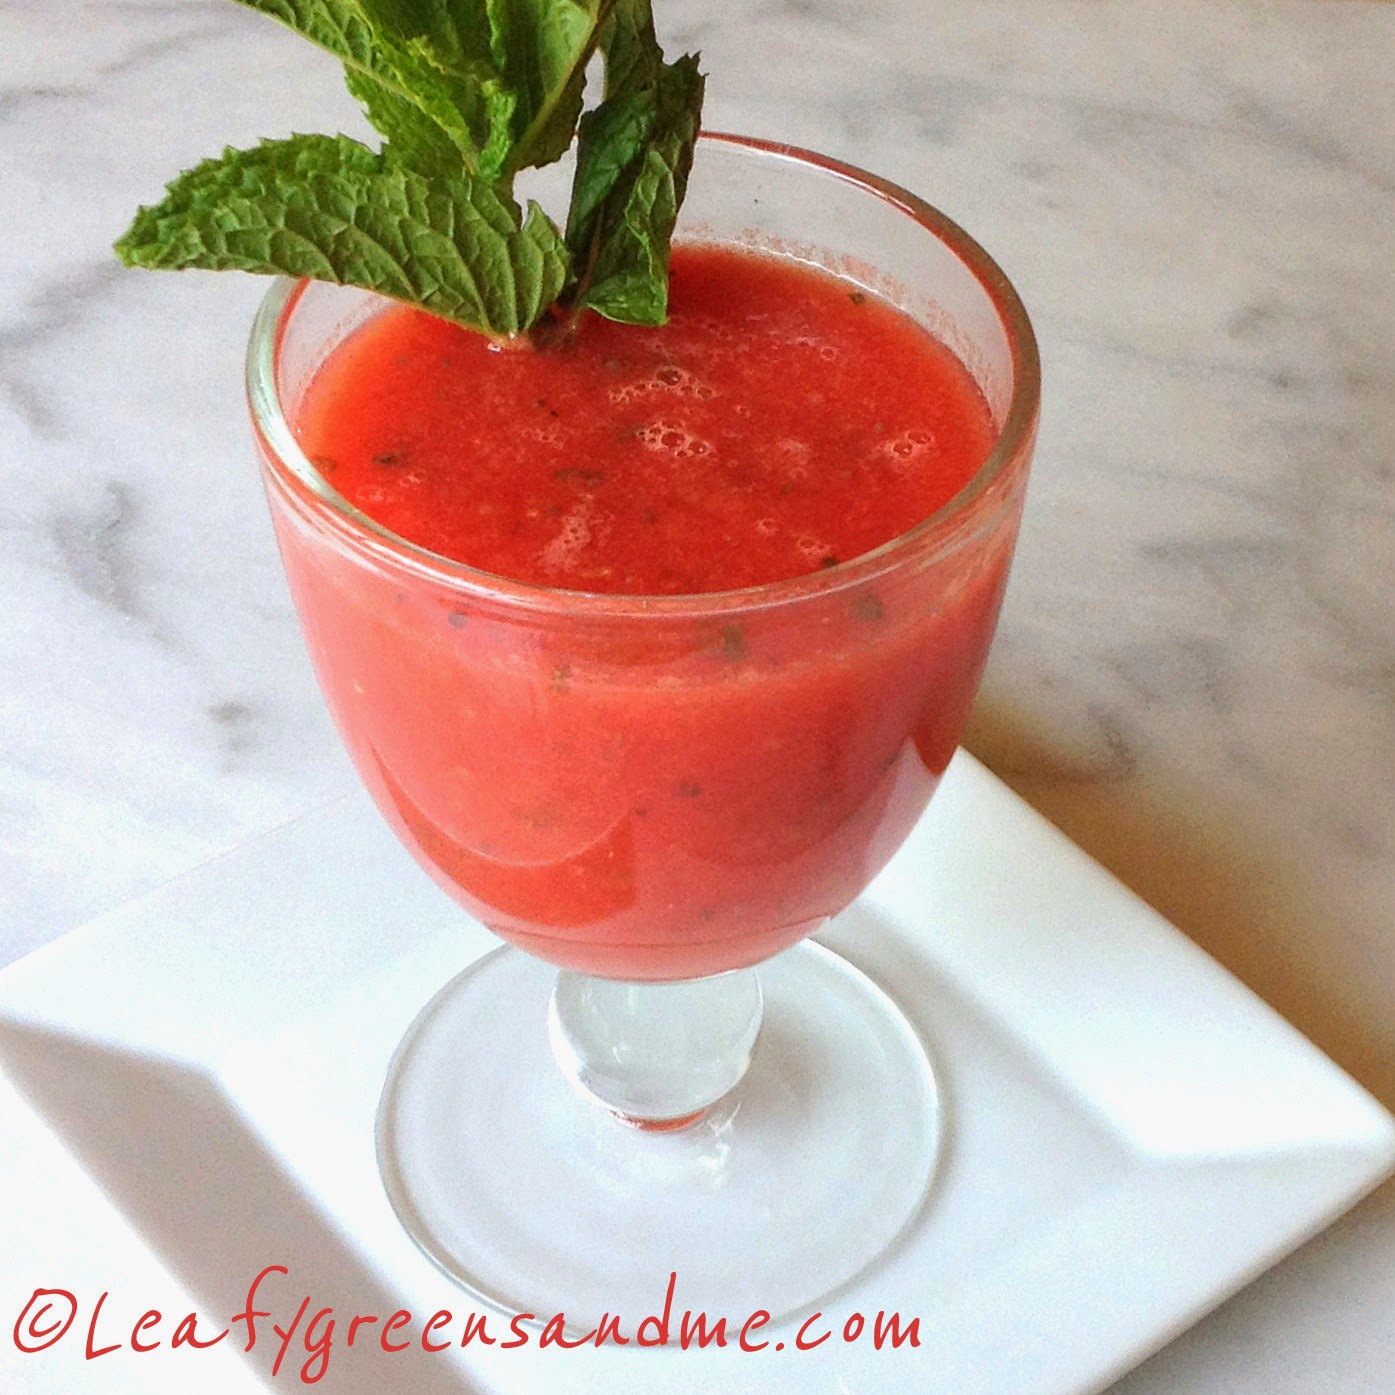
If the last two days are any indication of how hot it will be this summer, we're in trouble! But I've been staying cool and hydrated drinking my refreshing Watermelon-Chia Cooler.
You can use any melon, but I like the natural sweetness and color of seedless watermelon. Also chia seeds pack a powerful punch. They are high in Omega 3s, protein, fiber and are hydrating. I soak one tablespoon in one cup of filtered water in the fridge overnight and then use them in my juices and smoothies for added nutrition during the week. To get the full benefit of chia seeds you really need to soak them before using.
Ingredients:
Serves 1-2
1-1/2 - 2 cups organic seedless watermelon, chilled, cut into cubes
1-tbsp soaked chia seeds (You can add as much as you like, but they are very gelatinous and will thicken the consistency. Also, I like using black colored chia seeds instead of the grey. There is no difference in nutritional value between the two.)
1 tbsp finely chopped mint
1/4 - 1/2 cup sparkling water, chilled
Juice from a 1/2 lime
Agave nectar to taste (my watermelon was really sweet and so I didn't add any agave)
Method: Soak 1 tbsp chia seeds overnight, covered in the fridge. (Note: one tablespoon will turn into 1/2 cup soaked seeds.) Place watermelon in a blender and blend until smooth. Transfer puree to a bowl and stir in the remaining ingredients. Chill until cold and serve with a mint sprig.
Stay cool and enjoy!
Leafy Greens and Me
Monday, June 9, 2014
Thursday, June 5, 2014
Caprese Sandwich
Some of the best sandwiches are made with very few ingredients and this is one of them. I remember years ago we were traveling in Normandy, France (which is fitting because tomorrow is the 70th year anniversary of the D-Day Invasion of Normandy) and were in Mont Saint-Michel, an island located on the coast with a beautiful medieval town perched near the very top. Anyway, we stopped at a small outdoor stand and I ordered one of the best sandwiches I ever had, and it only had two ingredients: Gruyère cheese and butter on a baguette. Perhaps it was because we were sightseeing all day and we were exhausted, but coupled with the incredible scenery and history of the place, I will never forget eating that sandwich!
Now a Caprese sandwich has a whopping four ingredients but it is my go to sandwich when I want something quick after work for dinner in the summer. I love eating this sandwich when the heirloom tomatoes are at their peak...it's just so delicious with the fresh fragrant basil, Daiya Havarti style cheese, good quality extra virgin olive oil and a crusty French sweet baguette!
Cin cin!
Labels:
Breads/Baked Goods,
Sandwiches/Wraps,
Summer
Sunday, June 1, 2014
Gluten Free "Hostess" Cupcakes
My husband's birthday was a couple of weeks ago and I wanted to bake him a gluten-free cake from scratch, but I really didn't have time when I got home from work and so I made cupcakes using Pamela's Gluten Free Chocolate Cake Mix. They were absolutely delicious...moist, rich and super chocolatey! For the egg substitute, I used Bob's Red Mill Egg Replacer, but ground flax meal/water would work just as great.
To be honest, my husband probably would of preferred if I made Hostess Twinkies instead of the cupcakes, but Twinkies are so boring...it's just a vanilla sponge cake with piped in frosting. No creamy ganache icing or fun squiggly decoration on the top...just a boring sponge cake. Anyway, he loved them and I think that I made a chocolate lover out of him!
For the filling I used the same buttercream recipe that I used for my Veggie Cupcakes, but only made half of the recipe and I added a little more cashew cream about 1 Tbsp to make the filling smoother. Using a small plain piping tip and squeezed in enough frosting to cause the cupcake to puff up, but not to break.
And for the squiggle design I used a 1/2 cup sifted confectioners sugar with 1 Tbsp cashew cream and stirred until smooth. You want this to be really thick so that when you pipe the icing will hold its shape. Also, let the ganache set-up completely for about 30 minutes before piping the squiggly design. To speed up the process you can place the cupcakes in the fridge for about 10 minutes until the ganache sets.
To be honest, my husband probably would of preferred if I made Hostess Twinkies instead of the cupcakes, but Twinkies are so boring...it's just a vanilla sponge cake with piped in frosting. No creamy ganache icing or fun squiggly decoration on the top...just a boring sponge cake. Anyway, he loved them and I think that I made a chocolate lover out of him!
For the filling I used the same buttercream recipe that I used for my Veggie Cupcakes, but only made half of the recipe and I added a little more cashew cream about 1 Tbsp to make the filling smoother. Using a small plain piping tip and squeezed in enough frosting to cause the cupcake to puff up, but not to break.
For the ganache topping I used 1/2 cup Ghiradelli semi-sweet chocolate chips and about 3 Tbsp cashew cream. I placed it in the microwave for about 30 seconds until melted and then stirred in 1 tsp Earth Balance Butter. Before decorating the cupcakes, I let both the cupcakes and the ganache cool to room temperature and the iced the top of the cupcakes using a small off-set spatula.
And for the squiggle design I used a 1/2 cup sifted confectioners sugar with 1 Tbsp cashew cream and stirred until smooth. You want this to be really thick so that when you pipe the icing will hold its shape. Also, let the ganache set-up completely for about 30 minutes before piping the squiggly design. To speed up the process you can place the cupcakes in the fridge for about 10 minutes until the ganache sets.
Labels:
Breads/Baked Goods,
Brunch,
Chocolate,
Dessert,
Frosting/Glazes,
Gluten Free
Tuesday, May 27, 2014
Deviled Goodness (Vegan Deviled Eggs)
You can't have a holiday weekend without serving Vegan Deviled Eggs. Seriously these are amazing! My husband could not get over how much they tasted like the real deal, texture and everything. As I mentioned in previous posts, I have never liked eggs (no matter how they were prepared)...but with one exception...my Mom's Deviled Eggs. Everything she made tasted great and I think that she would love these too!
This recipe is so simple, but you'll need a mold to create the cashew-agar base to hold the piped tofu mousse. I used a ceramic deviled egg holder that I had in cabinet, but it was a little shallow. I'm going to look on line and see if I can find a deeper base, but other than that they were absolutely perfect...beautiful and delicious.
This recipe is so simple, but you'll need a mold to create the cashew-agar base to hold the piped tofu mousse. I used a ceramic deviled egg holder that I had in cabinet, but it was a little shallow. I'm going to look on line and see if I can find a deeper base, but other than that they were absolutely perfect...beautiful and delicious.
This recipe makes about 36 portions so you will need more than one mold because the agar will solidify if you don't work quickly. Or you can cut the tofu mouse recipe in half and pipe less.
Cashew Cream-Agar Egg Base:
1/2 cup cashew cream, (1/2 cup cashews blended in a high speed blender with 1-1/4 cup water. If you don't have a high-speed blender then you will need to soak the cashews for about 4 hours and then strain through cheesecloth or a fine strainer. You will not use all the cashew cream but it will keep in the refrigerator covered for up to five days.)
3/4 warm water
1 tsp Agar-Agar powder (I purchased my powder at an Asian market, for $2.99, but Whole Foods carries the agar flakes, but it will cost you about $9.00. Also, if you use the flakes then you'll need to increase the amount to 1 Tbsp and boil it a little longer.
1/4-1/2 tsp Black Salt (found in an Indian or Asian market--it's actually pink and very salty.)
Method:
- Lightly oil mold with vegetable oil and set aside.
- Blend cashews with water and measure out a 1/2 cup of cashew cream. Whisk in black salt and set aside.
- Pour 3/4 cup water into a measuring cup and warm in the microwave for 30-40 seconds. Whisk in agar-agar powder and then place back in the microwave for 1-2 minutes and let it boil.
- Place cashew cream into microwave for 30-40 seconds to warm and then whisk mixture into hot agar water making sure there are no lumps.
- Skim off any bubbles off the top before pouring into mold, or pop bubbles with a toothpick.
- Let mold sit on the counter for about 15 minutes before moving and placing in the refrigerator to chill for about one hour to harden completely.
Once hardened, using a small pairing knife, remove cashew-agar base and place on a plate. Then using a small melon baller or spoon, scoop out a small portion of the base without breaking through the bottom. Then pipe in the tofu mousse and chill for about an hour before serving. Also, the agar will not melt or soften if these are left out for a little while at room temperature, but they are better served chilled. So if you are serving a lot of people, I would serve a dozen at a time and keep the others chilled.
Tofu Mousse:
(You can cut the recipe in half if you are making less portions)
7.5 oz organic sprouted extra firm tofu (I used Wildwood--it comes it two sealed pouches, 7.5 oz each).
1/4 cup Follow Your Heart original organic Vegenaise
2 tsp spicy brown mustard
1 tsp turmeric powder
1/2 - 3/4 tsp black salt
1 tsp apple cider, or white wine vinegar
Method:
- Drain tofu and press dry with paper towels and place in a food processor.
- Add all ingredients except for black salt and blend until smooth and creamy. You may need to add a little more Vegenaise to get the right texture.
- Add black salt to taste and then pipe or spoon mousse into base.
- Garnish with paprika and chives and chill for about one hour before serving.
Thursday, May 22, 2014
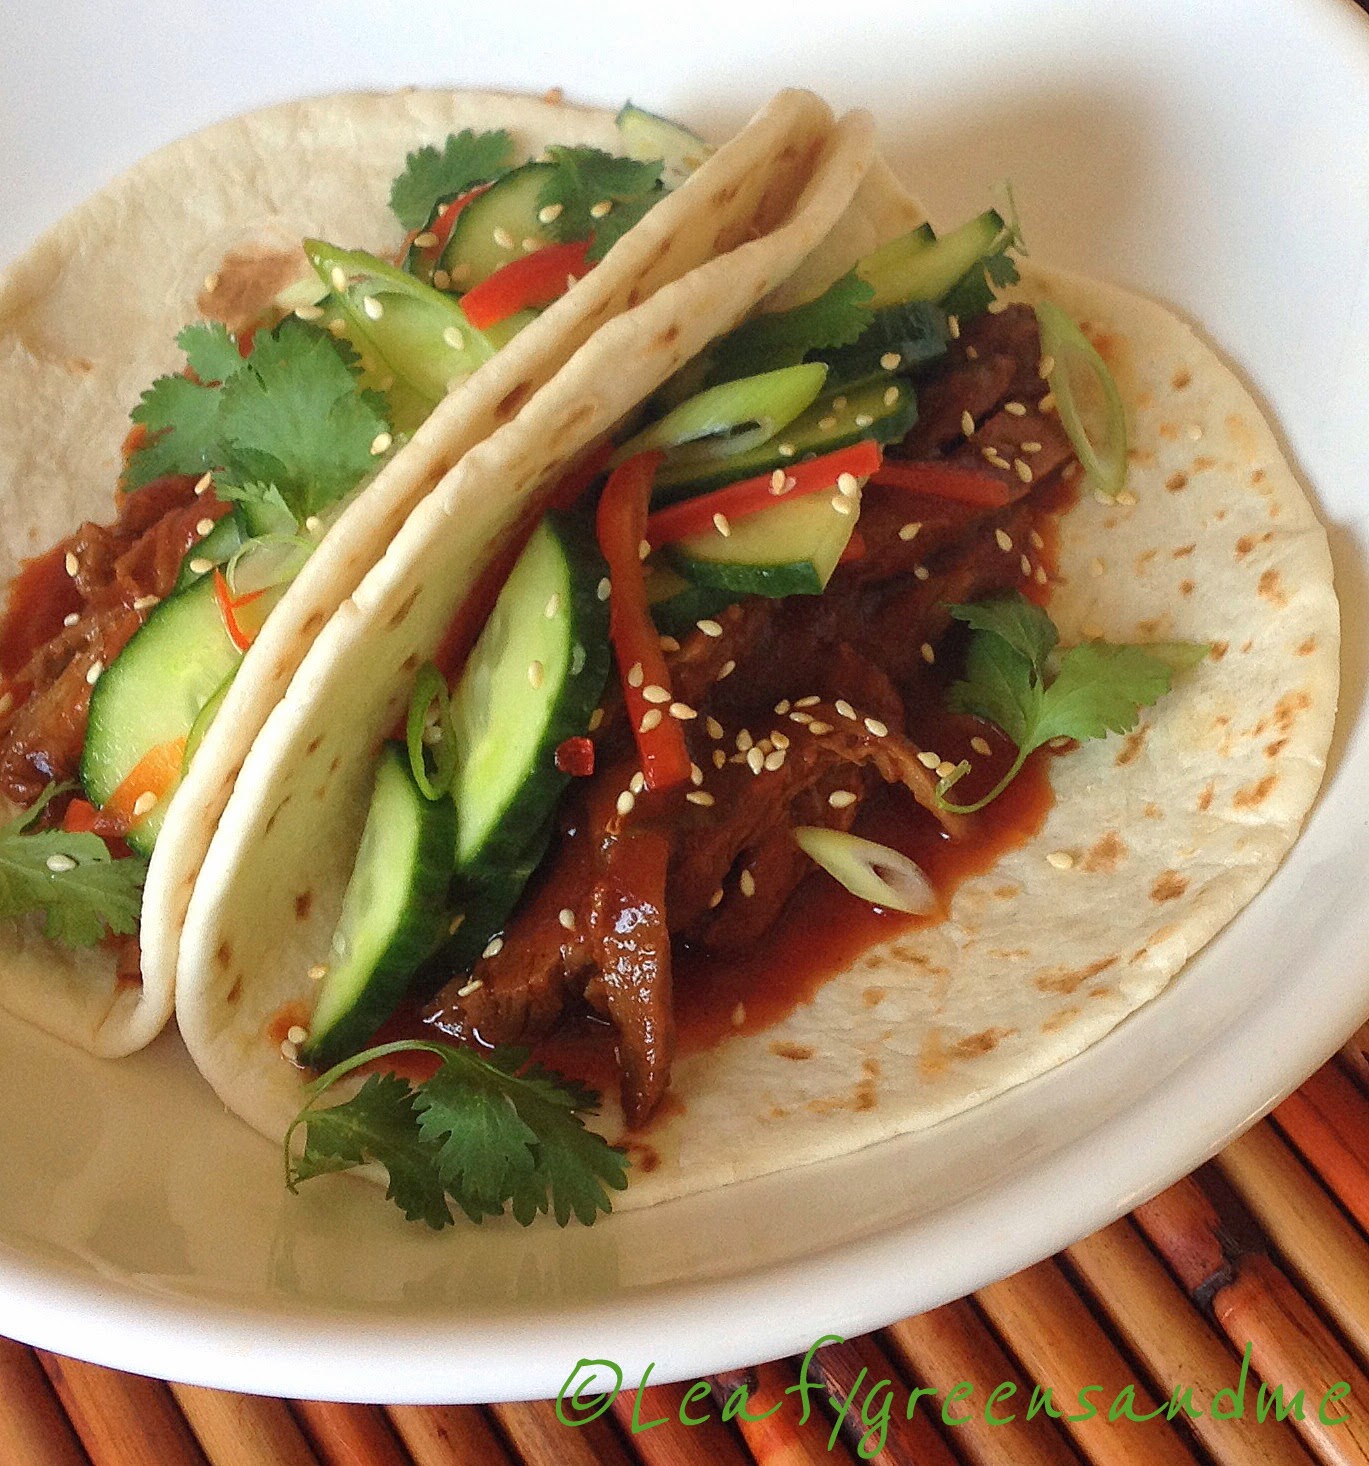
Spicy Korean Tacos with Pickled Cucumber Salad
I must confess...these really aren't spicy Korean tacos because I didn't have any Gochugaru (Korean red pepper flakes or paste), but you really don't need it. I made a quick spicy BBQ sauce using ketchup, sriracha, tamari, rice wine vinegar and water. But you can just purchase your favorite spicy BBQ sauce, and doctor it up with some soy sauce and you're all set. Whenever possible try to purchase organic BBQ sauce that doesn't contain high-fructose corn syrup.
What really makes these tacos is the crunchy pickled cucumber salad. Here's what I used:
1 medium English cucumber sliced into half moons
1/4 red bell pepper, seeds and ribs removed and julienned into thin strips
1/4-1/2 tsp crushed red pepper flakes
1/3-1/2 cup rice wine vinegar
1-2 Tbsp light agave syrup
1/4 cup green onion, sliced on a bias
Kosher salt to taste
Method: Place all ingredients in a bowl (except for the salt) and let marinate in the fridge for about one hour before using. Salt just before serving so that the cucumbers maintain their crunch.
Not only is this a super quick weeknight dinner but it would be great for Memorial Day weekend. If you can find sheets of seitan, I would brush the grill lightly with oil and grill for 1-2 minutes on each side, then slice into thin strips and toss in the warm BBQ sauce.
For the tortillas you can use corn or flour, but I prefer flour because this is a substantial taco and corn tortillas will not hold up to all the ingredients. For garnish I used green onion, cilantro and toasted sesame seeds.
Wishing you a safe holiday weekend and I'll post my homemade hot dogs and buns next week (if they turn out...but I think they will)!
Labels:
Asian,
Breads/Baked Goods,
Faux Meat,
Salads,
Sandwiches/Wraps,
Sauces/Marinades,
Seitan
Sunday, May 18, 2014
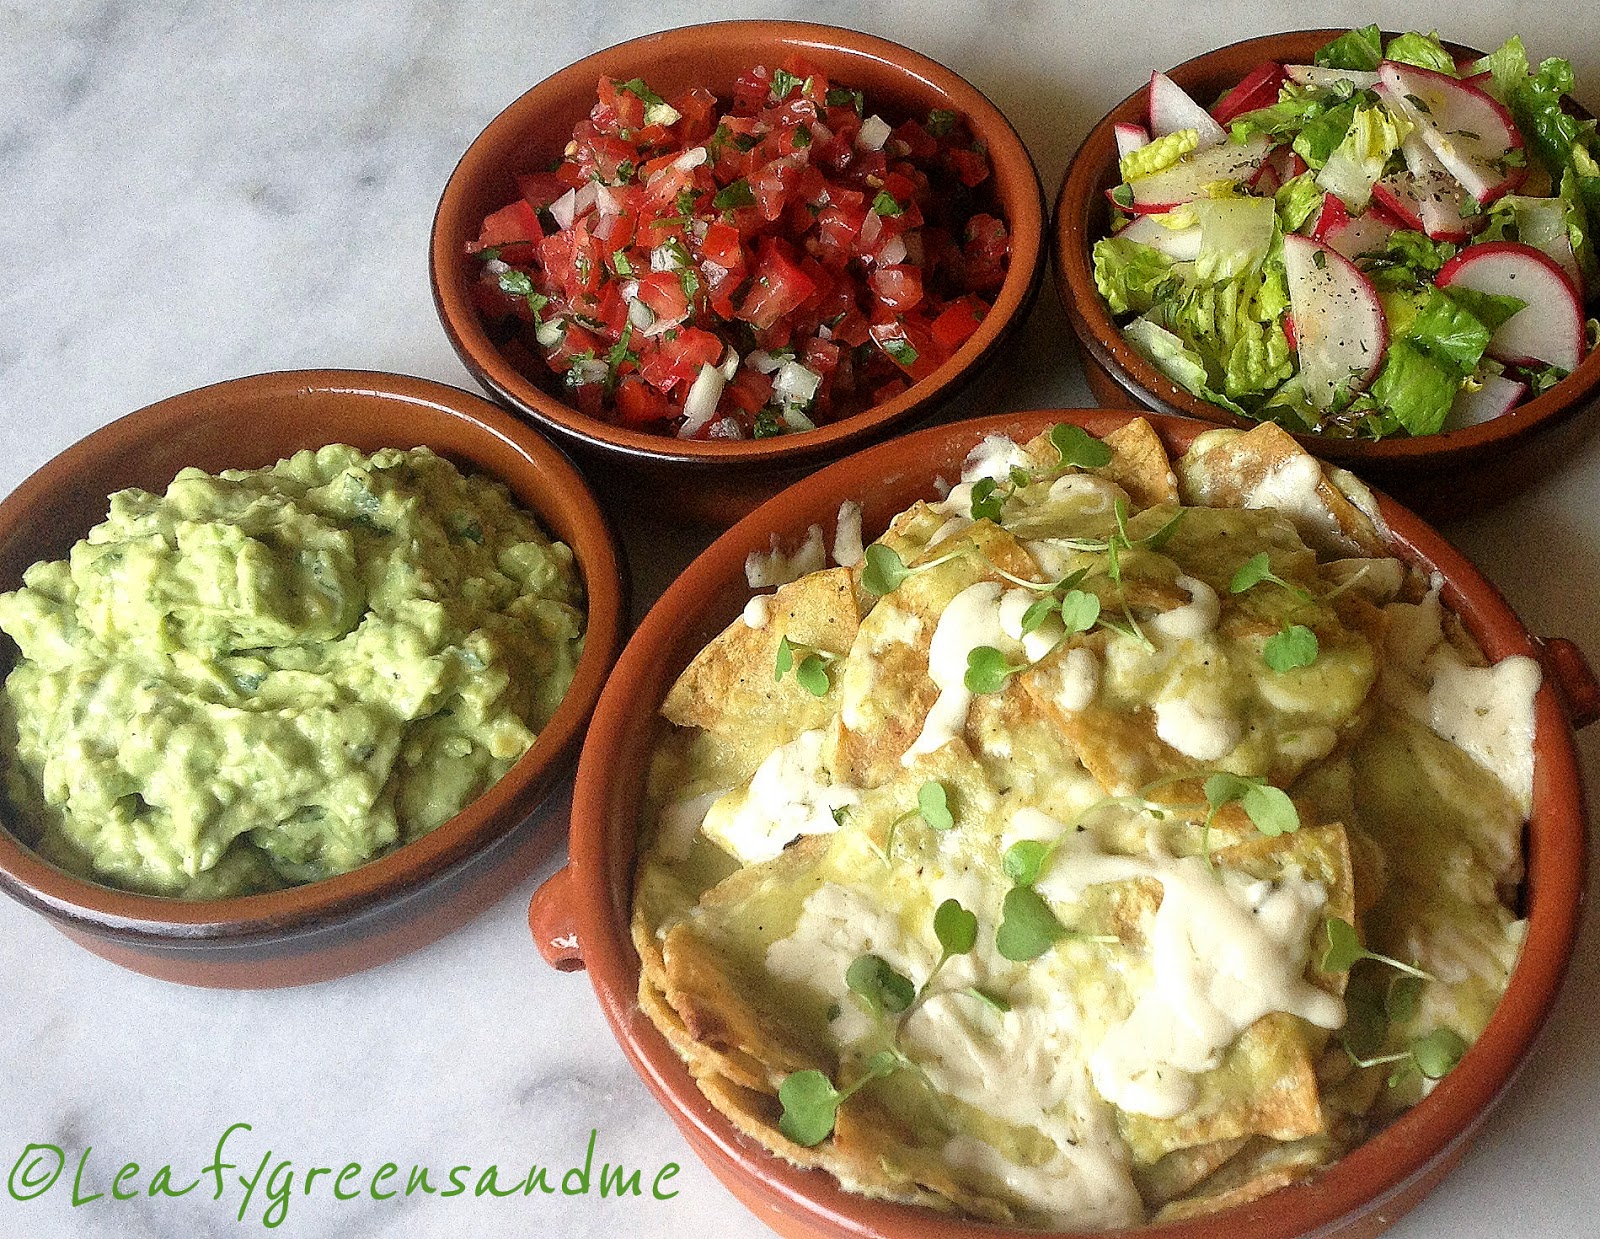
Verde (Tomatillo-Poblano) Chilaquiles
I learned how to make Chilaquiles as a line cook working at a restaurant. At least once a week while we were prepping for service Noel and Bernardo (my amigos) would take turns making them for our family meal. They were always made with a red sauce, somewhat spicy and super delicious. Noel would always give me a hard time because I never made Chilaquiles for them. So one day I came in a little early and I made Verde Chilaquiles and they loved them...I felt so great that the pressure was finally off. But one can only produce the best dish when one learns from the best...and Noel and Bernie were truly the best!
Verde Sauce:
3 Tomatillos, skins removed
1 Poblano pepper
1 Jalapeno pepper
1 Onion sliced (skin on)
3-4 Garlic cloves (skin on)
1/3-1/2 cup vegetable broth
1/3-1/2 cup cashew cream (1/2 cup cashews, blended with 1 cup water)
1/4 cup cilantro (optional)
Kosher salt and black pepper to taste
Method: Preheat oven to 400 degrees. Place all ingredients on a sheet tray and roast for 10-15 minutes until charred. You may need to need to remove the garlic first so that it doesn't burn. Let cool and peel and seed peppers. Place in a blender and blend until smooth. I did not add cilantro to my sauce because I added it to the pico de gallo and guacamole.
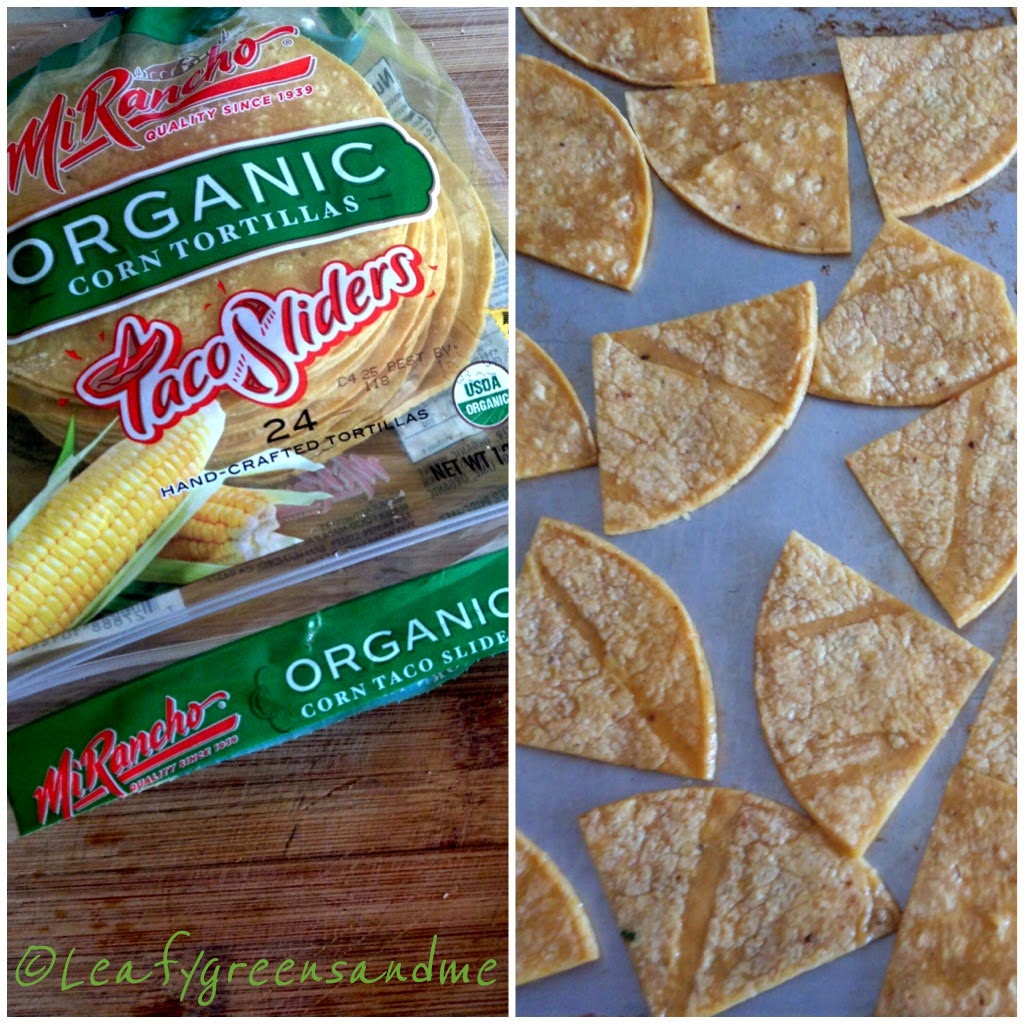
After you make the sauce, turn the oven down to 325 degrees to toast the tortilla chips. Normally, the tortilla chips are fried but you don't need to do this. Baking produces the same end result without all the fat and calories. When purchasing the corn tortillas I usually look for a heartier brand that will hold up to the weight of the sauce and cheese without becoming too soggy, but soggy is good too! I like using the sliders because they cut perfectly into 4ths.
Method: Spray a sheet pan with vegetable spray and then spray the top of the tortillas lightly and sprinkle with salt. Bake in the oven for about 12-14 minutes until crisp and lightly golden brown. Turn chips over half way through the baking and keep an eye on them so they don't burn.
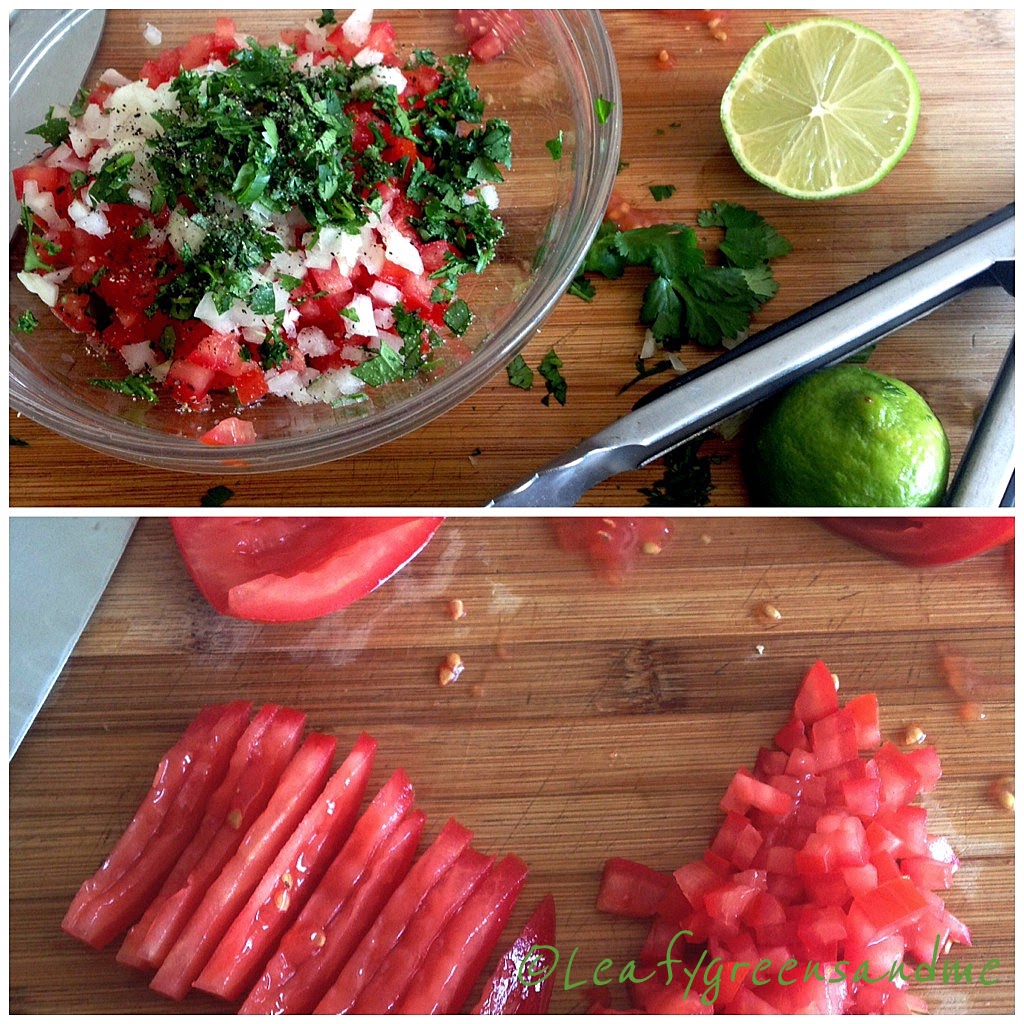
You have no idea how many gallons of pico de gallo I have made in my lifetime! It is so easy and I prefer homemade salsa over store bought any day! There is really no recipe for fresh salsa. If you don't like white onion, add red onion and if you like it super spicy then add the whole jalapeno or leave in the seeds. The most important thing is to dice and mince the tomatoes/vegetables perfectly...it's all about uniformity!... :-)
Pico de Gallo:
5 organic Roma tomatoes, seeded, julienned and diced
1/4 cup finely diced white onion
1/2 jalapeno, seeds removed and finely diced
1/4 cup chopped cilantro
Juice of 1 lime
Kosher salt and black pepper to taste
Assembly:
I like using individual cazuelas to serve my Chilaquiles. (Serves 2)
Baked Tortilla Chips
2 - 3 cups Verde Sauce
1 package Daiya Havarti-Jalapeno Style Cheese, shredded
Kosher salt and black pepper to taste
Method: Preheat oven to 350 degrees. Add chips to a large bowl, along with 1/2 of the shredded cheese. Heat sauce on the stove, adding additional veg stock if the sauce is too thick. Pour sauce over chips and toss evenly to coat. Divide mixture evenly between cazuelas or ramekins and top with additional cheese. Bake in the oven for 10-15 minutes on a sheet tray until mixture is bubbly. Remove from oven and serve immediately garnished with cilantro and green onions.
And now for the toppings. At the restaurant we would always serve our Chilaquiles topped with pico, guacamole (avocado, cilantro, green onion, Vegenaise, lime juice, salt and pepper) and salad made with romaine lettuce, radish, jalapeno, tossed with a red wine-oregano vinaigrette. It doesn't get any better than this. To my friends...Noel & Bernardo...thank you for everything you taught me in the kitchen!
Labels:
Breads/Baked Goods,
Entertaining,
Mexican,
Salads,
Sauces/Marinades,
Spanish
Thursday, May 15, 2014
Smoked Tofu and Cucumber-Dill Tea Sandwiches
With all of our record temperatures the past three days my house hasn't been too unbearable, but I still haven't turned on the stove or oven. These little tea sandwiches are just perfect for the dog days of summer, as well as any upcoming wedding or baby showers! If you want more variety you could serve my Egg(less) Salad on white bread, my TuNo Salad on wheat bread, and the smoked tofu on rye, which is what I used.
Dill Aioli:
1/2-3/4 cup Vegenaise
1/4 cup minced dill (more or less)
2 TBSP minced capers (more or less)
Juice from 1/2 lemon
Kosher salt and black pepper
Other ingredients:
1 packet sprouted organic smoked tofu, sliced thinly (I used Wildwood with Szechuan spices because I like a little kick)
1/2 English cucumber, sliced thinly
Red onion, shaved thinly (optional)
Rye bread (I used Genuine Bavarian Whole Rye Bread)
Enjoy and stay cool!
Labels:
Salad Dressings/Vinaigrettes,
Sandwiches/Wraps,
Spring,
Summer
Subscribe to:
Posts (Atom)
